
Decomposing Chasing Sakura
I cannot believe it is almost a year since my previous blog post. I had good intentions of writing more in late 2022 and the first part of 2023 but my motivation for writing hit an all time low. Plus life has been busy to say the least.
Recently, I had the great privilege of being a guest on Matt Payne's photography podcast, F-Stop Collaborate and Listen, episode 312. I thoroughly enjoyed talking with Matt about my photography and creative journey. If you get the chance to listen to the show, I'd love to hear from you. You can support Matt and his show by becoming a valued patron over on Patreon.
Since Matt and I discussed creativity and experimentation, I figured it would be fitting to write about how my experimental image “Chasing Sakura” was created. I will be decomposing the image to show you how I use manual multi-exposure techniques to unlock creativity.

Inspiration
With my photo montages or composites, I never try to force them. I want them to feel organic and not just a byproduct of playing around in Photoshop. As always. I want the images to have a meaning behind them, a message and a story with a purpose.
The inspiration behind "Chasing Sakura" is the approaching Spring season here in Colorado. This winter has been a long and cold one. Much colder than in the previous few years. I am definitely looking forward to the rebirth of Nature, of blossoming flowers, wildlife, and warmer days exploring the mountains and rivers near me. Soon the trees will wake from their dormant state and adorn their branches with fresh veils of green and yellow hues.
Building Blocks
“Chasing Sakura” is a photo montage consisting of three separate images from my photo library. My base image was an image of a wonderfully shaped tree barren of leaves, then an ICM image, and finally an image of wildflowers.
I had been trying to find a way to incorporate the tree in a photo montage for several months but I was never pleased with the outcome. Sometimes an idea will surface during a hike and that is how “Chasing Sakura” started.


Merging Phase
Next came the merging phase where I combined my three images using a mix of blend modes, masks, and opacities in Photoshop. This stage of the process is exciting and fun for me because I get to experiment. Putting on some music in the background helps focus the mind and the creative eye.
I started with the tree image as my base. The branches are dark compared to the rest of the sky so I knew that when I add layers above this could yield some interesting results.
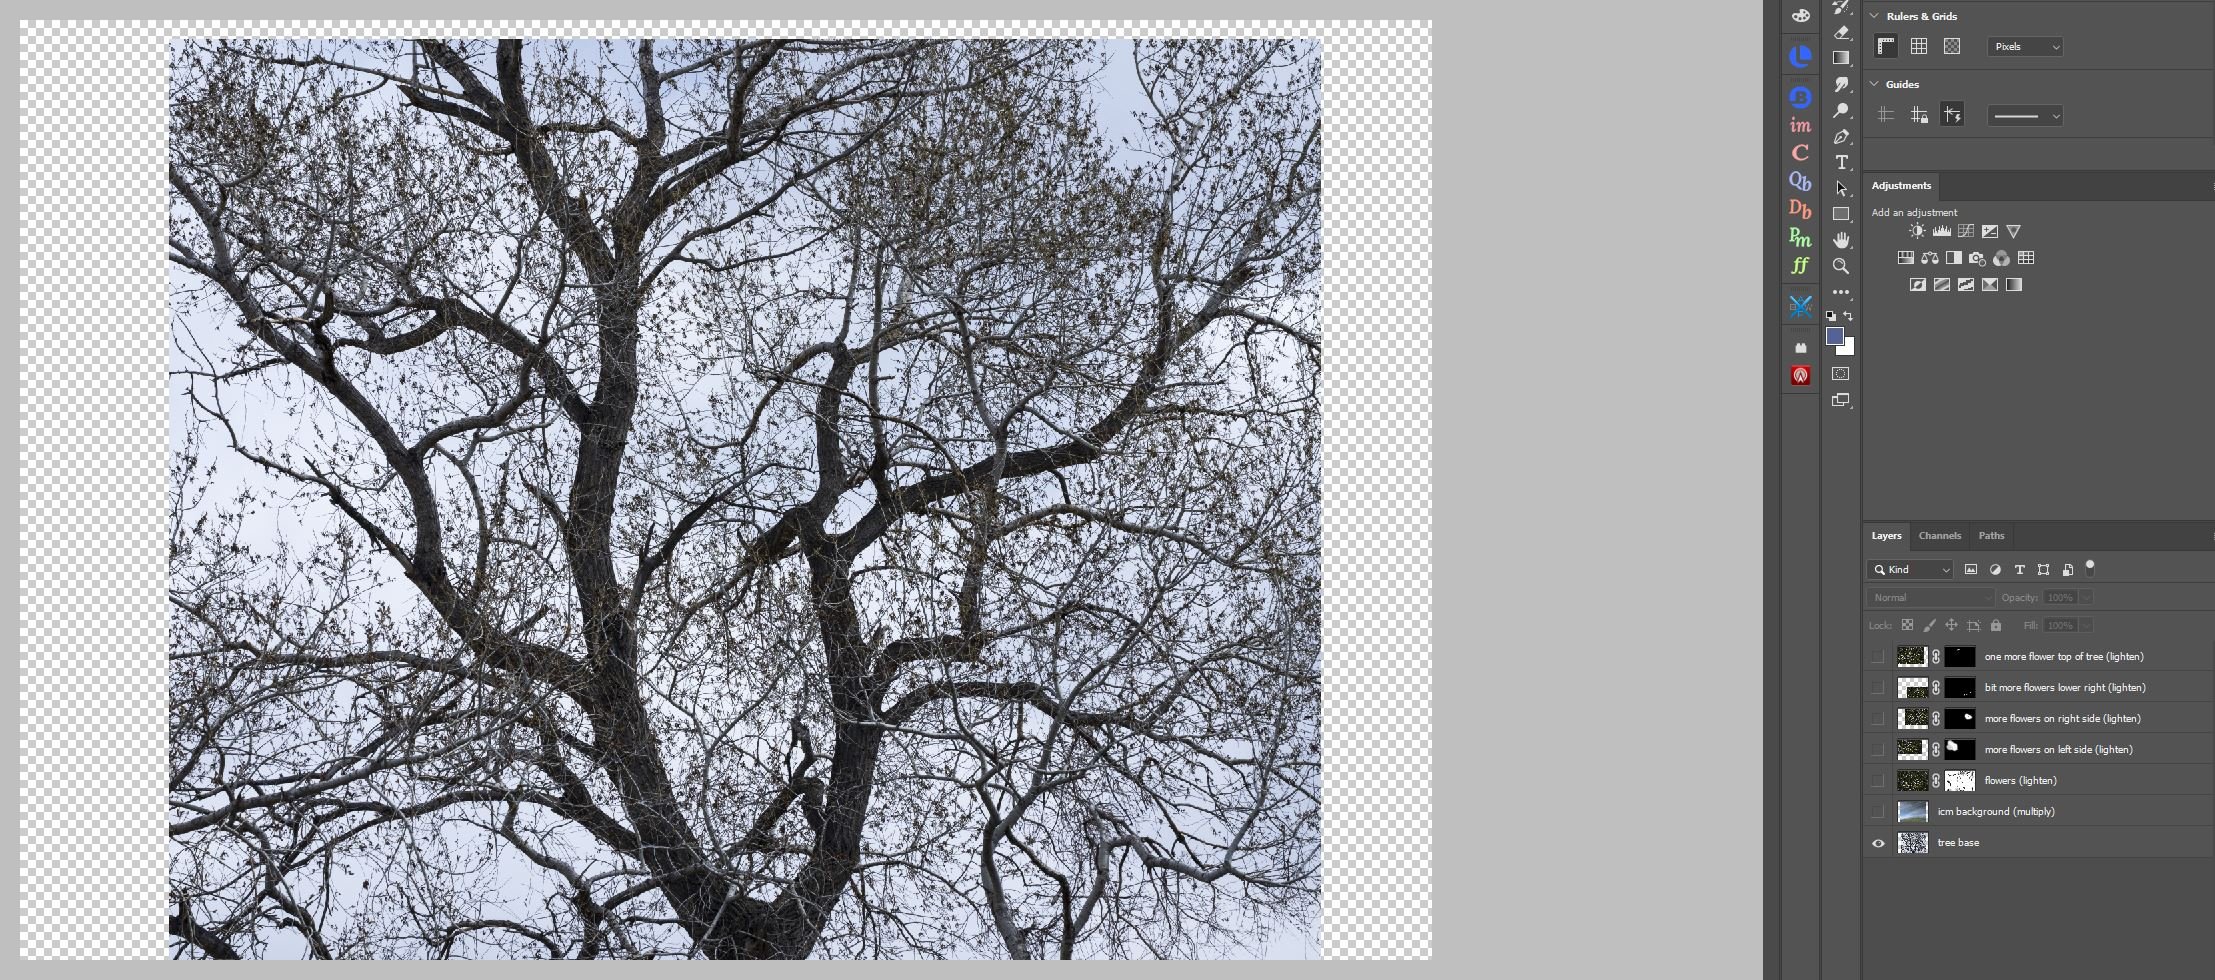
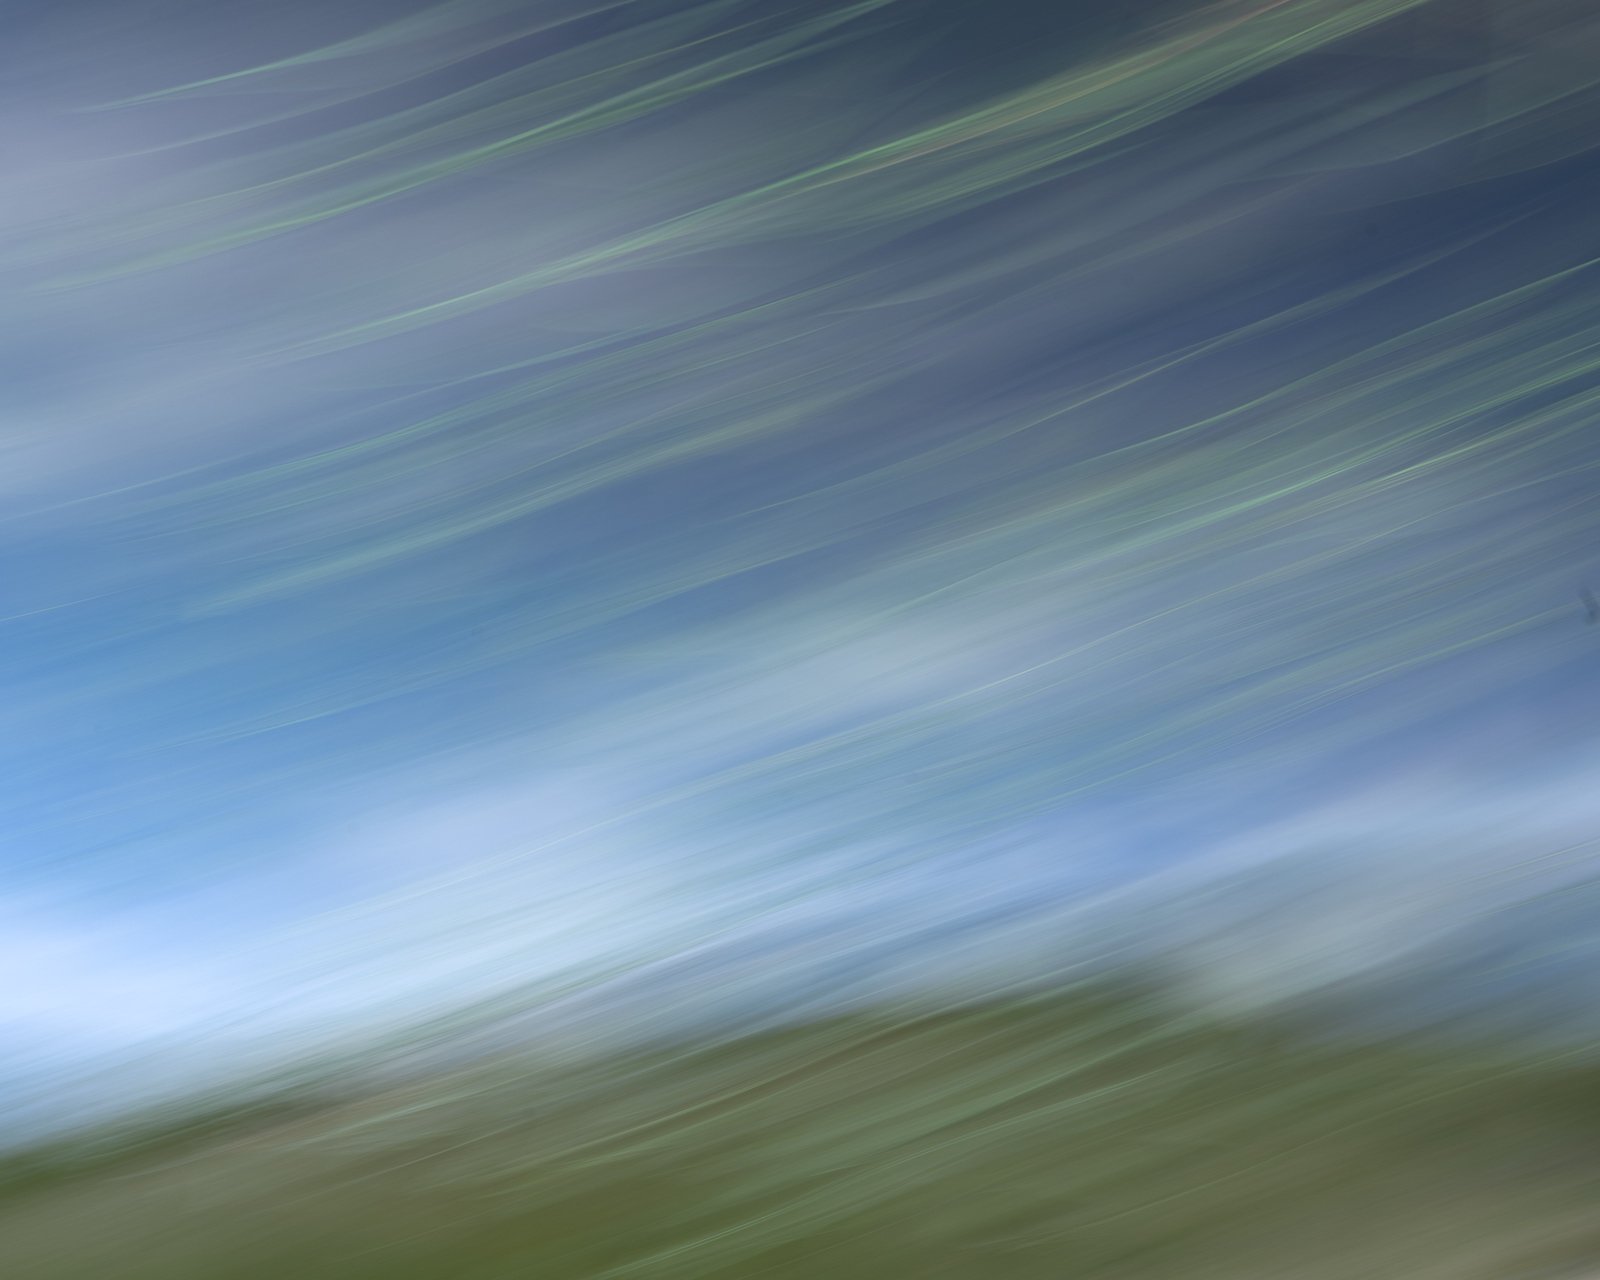
Next, I added in my ICM image which is essentially a shot of water and grasses although it looks like blue sky and a grassy hill. I experimented with various blend modes but ultimately decided on Multiply. This helped the ICM image blend into the background filling in the bright areas around the tree. This also helped the darker tree shape stand out more.

I then added in my flower or “sakura” layer. The flowers were bright and colorful so I used the Lighten blend mode at 100% opacity. I was fortunate that the original flower image had a nice distribution of flowers which overlayed well against the branches of the tree.
I applied a layer mask to remove or paint out any distractions such stray grasses. You can see that the three images are different aspect ratios but that is ok. I will crop out and clean up the framing later in Lightroom.

Here is the layer mask I used on the flower layer. I use a Wacom tablet and pen for better control. I quite enjoy this process of refining the masks.

Refinement Phase
Refinement of the image was needed next so I duplicated the flower layer. I wanted to add a few more flowers to the empty space in the upper left branches. I moved the layer around to isolate some of the flowers, applied a black mask to hide the layer. Then with a brush I revealed parts of the layer and flowers to fill in that area. I kept the blend mode on Lighten and dropped the opacity down to 80%.
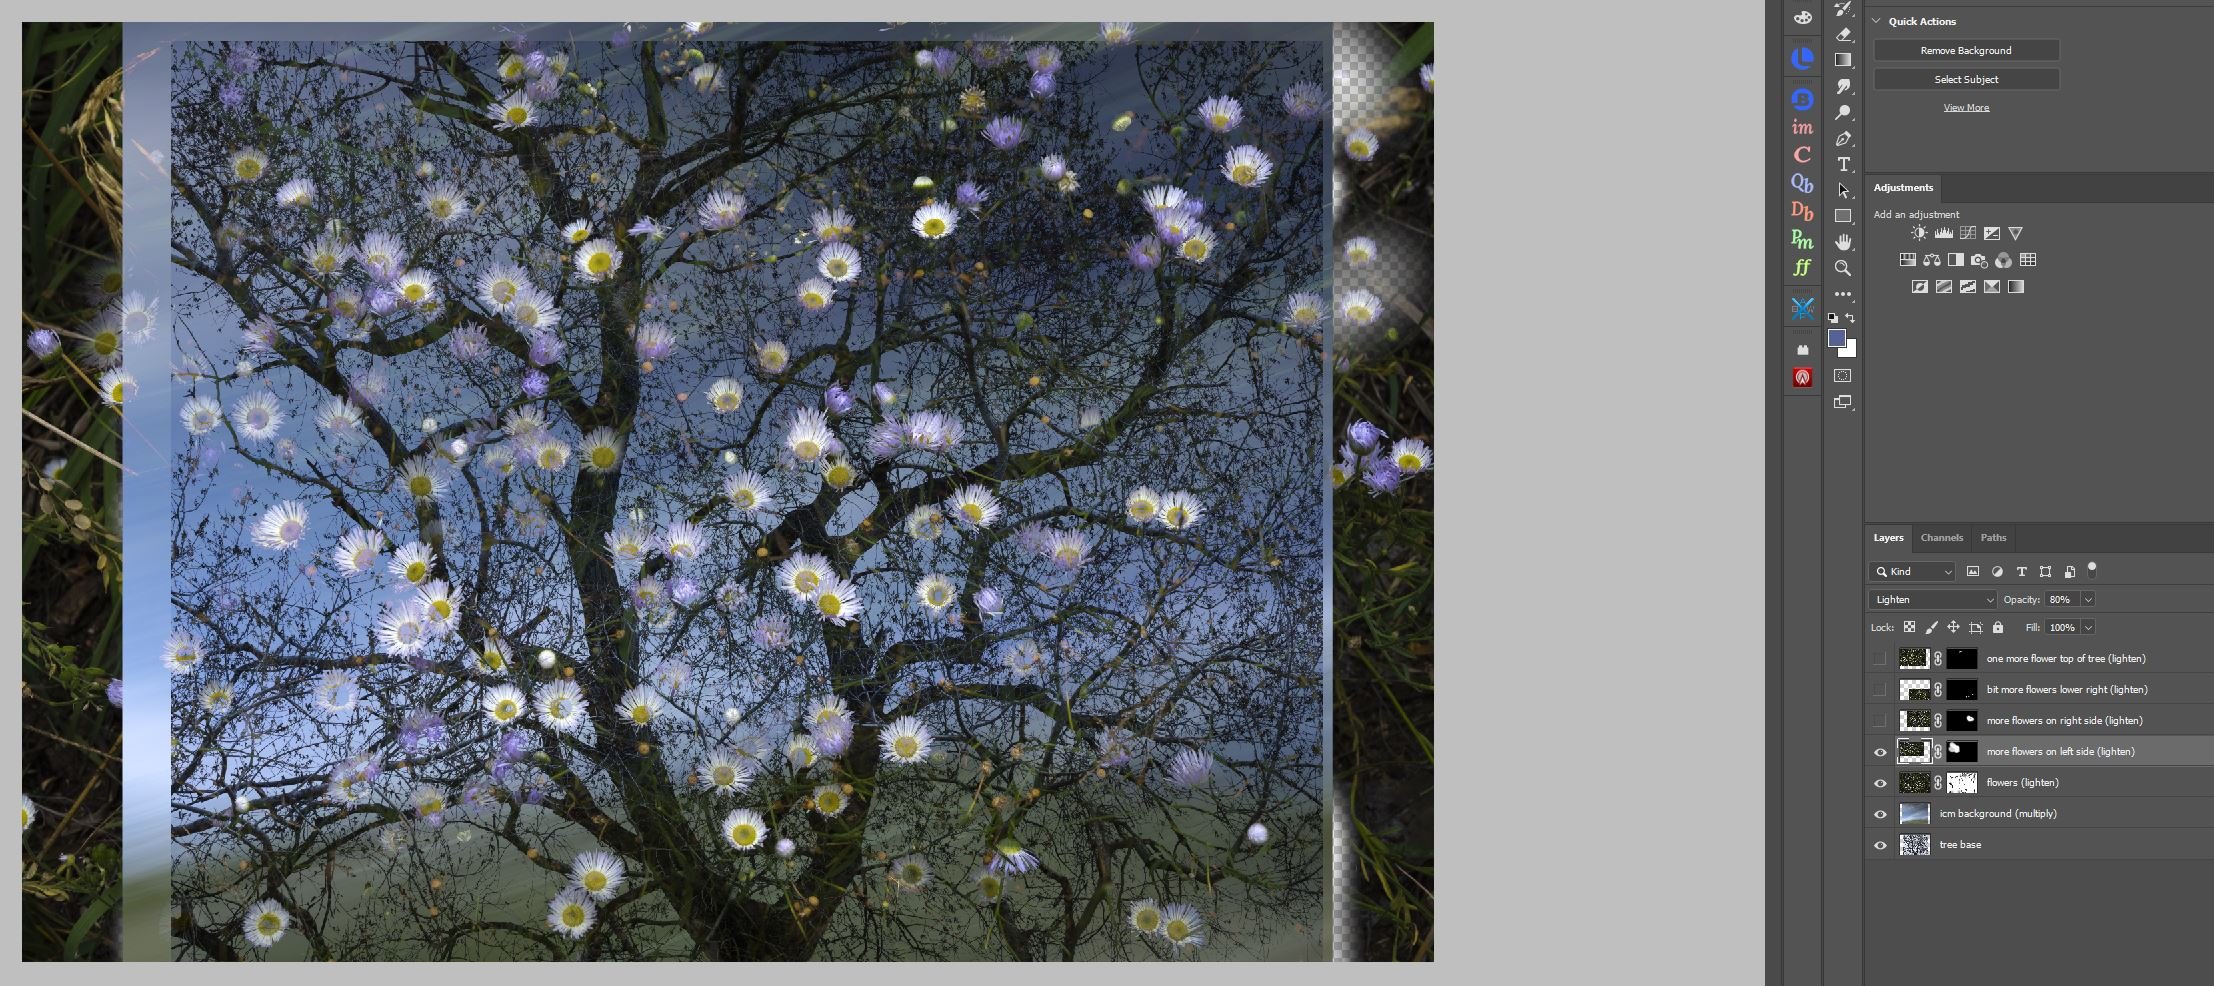
I repeated the process above several times and filled in a few more areas with flowers, specifically the lower right branch section and one flower in the upper section of the main branch. Lighten blend mode was maintained for these three layers.
It is important to take some breaks in between these stages to help rest and reset your eyes. I often find that when I return to a project like this I find something new that needs further refinement.

Finishing Phase
Back in Lightroom, I cropped the image to a final 4x5 aspect ratio since the original tree image I started with was using that format. You can see that the image is starting to take shape but there are some areas that need attention. I used some radial and gradient adjustments in Lightroom to fix the uneven tonality especially in the upper section of the image.


The History panel shows the overall adjustments including reducing clarity and adjusting the tone curve for the exposure levels. The image is nearly complete.


After a few days, I worked on the image once more. I performed edge patrol and cloned out any distractions such as branches that were partially in the frame. I also cloned out a few bright areas in the flowers. The area with the branch on the upper right still appeared dark to me so I added another adjustment in Lightroom and intersected the mask with the dark tones. I bumped up the exposure to correct that area. Zooming out in Lightroom or Photoshop to make the image small helps to spot any distractions.
Below is the final version after completing all of the merging, refinement, and finishing steps. I enjoyed the creative process and experimenting with my original three images using a manual multi-exposure techniques to arrive at this final result. Thank you for following along!
If you have any questions, please let me know in the comments section. If you are interested in ordering a print, please email me.
